Getting Started
Before you start using the Google Drive Connector, there are a few steps you must take. Since the Google Drive Connector relies on the OutSystems Platform's REST capabilities, you must:
- Create a Google account;
- Register your Project in Google Drive;
- Retrieve your Application Key and Application Secret;
- Fill in the configuration screen form, in order to try out the Connector's demo
Lost? Worry not! We will guide your through all the necessary steps to do it.
Create an account in Google
In order to start using the Google Drive Connector, you'll need to have an account in Google. If you haven't got one already, you can create it
here.
Register you Project in Google Drive
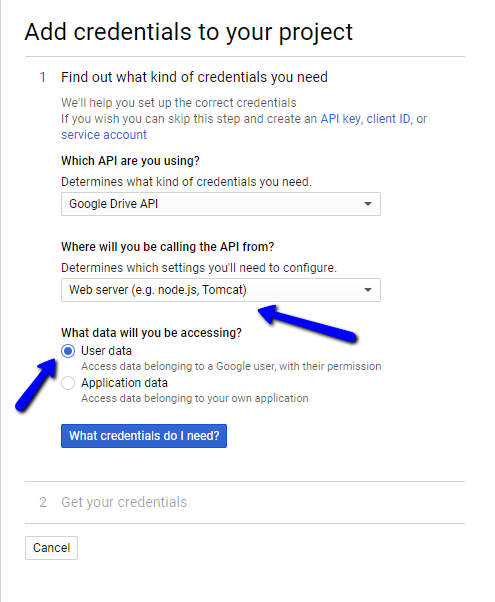
After pressing continue, you will get the following information stating that the API has been enabled. Click on 'Go to credentials' to be redirected to the Credentails wizard. Here, you must create a new Cliend ID, under the OAuth section, as depicted in the image below:
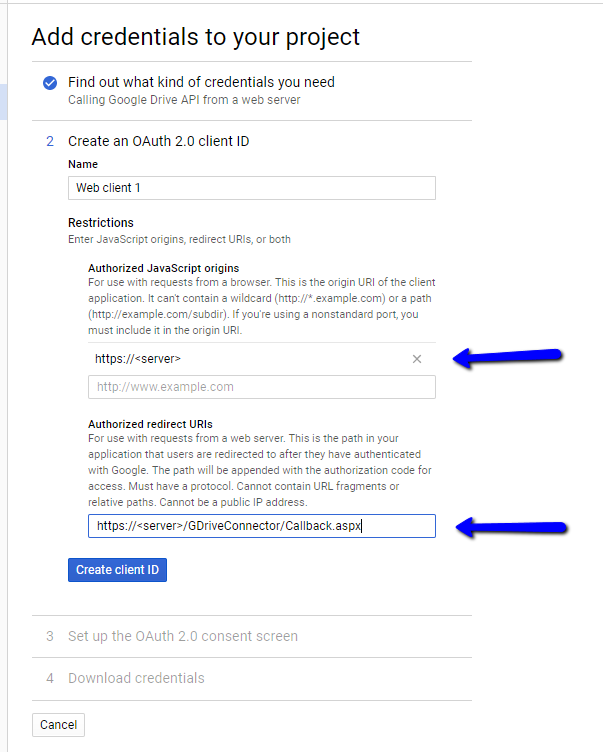
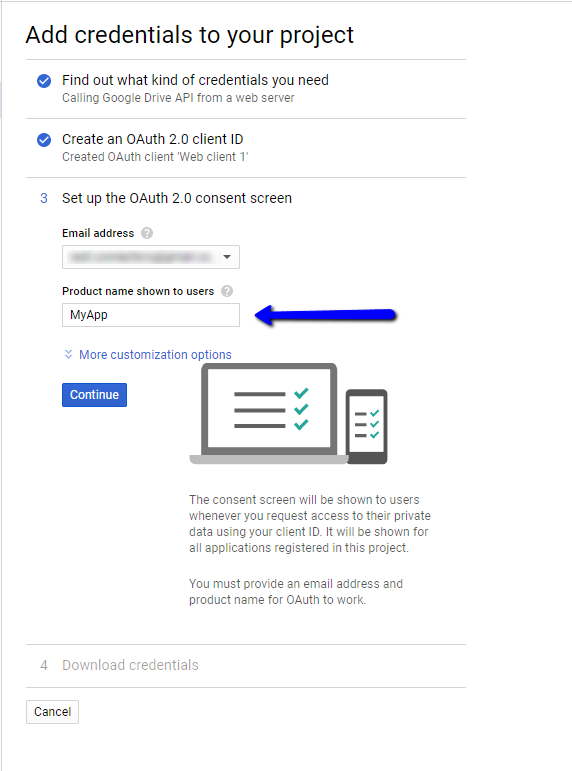
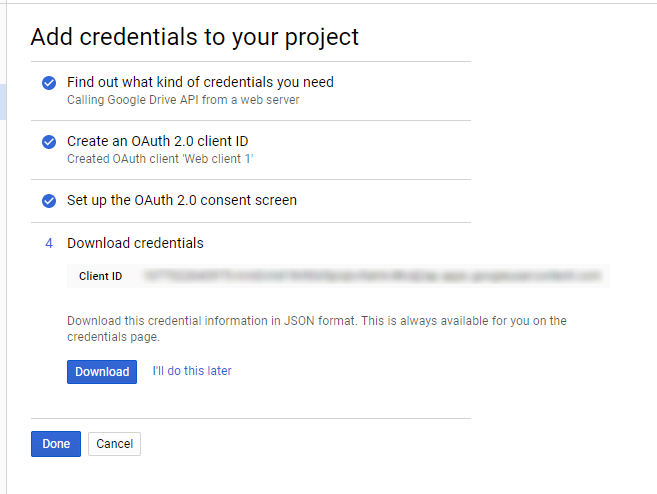
At the credentials wizard, you must pay attention to the Application Type and the Authorized Redirect URI and follow all steps.

Click on 'What credentials do I need?'
to go to step 2

Click on 'Create client ID'
to go to step 3

Click on 'Continue'
to go to step 4

Click on 'Done'
to finish
Be sure to set the redirect URL as displayed in the screenshot. Your end-user will be redirected to this page after authenticating in Google Drive.
Furthermore, you will need to create a new Key, under the Credentials menu. Make sure you select API key.
After performing the previous steps, you will be provided with the API Key, Client ID and Client Secret that you will need to use the connector.
At this point, check if the API was effectively enabled. It must be enabled in order for the Connector to work. Under the Library option, on the left hand side, make sure you have the Drive API option to disable.
Finally, you still need to give your project a name. That can be done under the Credentials screen menu.
The name you give to this project will be shown to users when authorizing the access, so make sure that you pick a name that end users will be able to recognize.
Verification of your app by Google
Before getting starting, you should do a Domain verification. To accomplish that you need to create a simple page of privacy policy, to someone who press the login button knows the answer fot the following questions:
- Who is requesting Google user data?
- What data are you requesting?
- Why are you requesting Google user data?
This information need to be public and need to visible on the login page (it can be inside a popup).
Setting up your Application
Now that you have checked that everything is good , it's time to start coding.
Almost every method in the Google Drive API needs an authorization code. To get it, one needs to redirect users to Google Drive and handle the callback from it, in order to get the referred authorization code. Fortunately, we have got you covered. All you need to do is to import the HandleNoAccessTokenException page from the Google Drive Connector.
Then, when a user hits a page and there's no authorization code in session, an exception will be raised and the user will navigate to the Login Page.
Congratulations! You now know everything you need when it comes to the Google Drive Connector.